In this article, we’re going to dive into exactly how to add subtitles to YouTube videos.
YouTube is a global platform, it’s the second most visited website worldwide in fact. As the platform caters to a global audience, you may find that you have viewers watching from all around the world.
To help you get your message across to these viewers more successfully, YouTube provides many useful features, like translation, as well as subtitles and captions, which is what we’re looking at in this article.
Before we dive into how to add captions and subtitles to your videos, you may still be thinking, why should I use subtitles and captions on YouTube videos? Let’s look at some of the main benefits.
Benefits of adding subtitles to your YouTube Videos
YouTube has a global audience, but by providing captions, you’re not just reaching more international viewers, you’re also allowing your videos to be more accessible to people that are deaf or have hearing impairments.
By adding subtitles/captions you’re also removing any potential dialect problems which can be a tricky subject, even for native speakers. This means that for example, people from Texas would be able to still understand me, even if my South African accent happened to be difficult to listen to on video.
Captions also play a big role in YouTube Optimization and help to increase the search ranking of videos so that they are more easily discovered through search engines (YouTube and yes, even Google search).
YouTube creates an automatic transcript of your video once uploaded and like your titles and descriptions, this transcript has an effect on your video’s search engine optimization. This is why you should mention your main keyword near the beginning of your video.
Another benefit of adding captions to your videos is that many people consume content with sound off. This is often the case when people are in public areas and don’t have earphones with them. If the main message of your video is mostly verbal, then viewers without sound are very likely to leave.
Closed Captions vs subtitles: What’s the difference?
Now I’ve used captions and subtitles interchangeably in this article, but there is a difference between the two. Both appear in the same place for the user when watching a video, but the main difference lies in the purpose.
Captions are there for viewers who can’t hear the audio. So people who are deaf, have hearing impairments or have their audio turned off.
Subtitles are there for viewers who can’t understand the audio.
Subtitles are what you see in a movie when the actors speak another language. This is mainly used for translating the audio to the viewer’s preferred language, or for making the audio in the video more understandable (I.e. if you can’t understand the accent, even though you speak the language).
On YouTube, both captions and subtitles are used interchangeably, you can add additional translations, but it is all dealt with from the same area, which is why I’ll also continue to use them interchangeably here.
Now that you know the main benefits of captions and subtitles and the main difference between the two, let’s get into actually adding subtitles to your YouTube videos.
How to add subtitles to YouTube videos
To upload and add captions to YouTube videos, you’re first going to need a YouTube channel and upload your video.
You can add subtitles during the upload process or in your YouTube studio on videos that have already been uploaded.
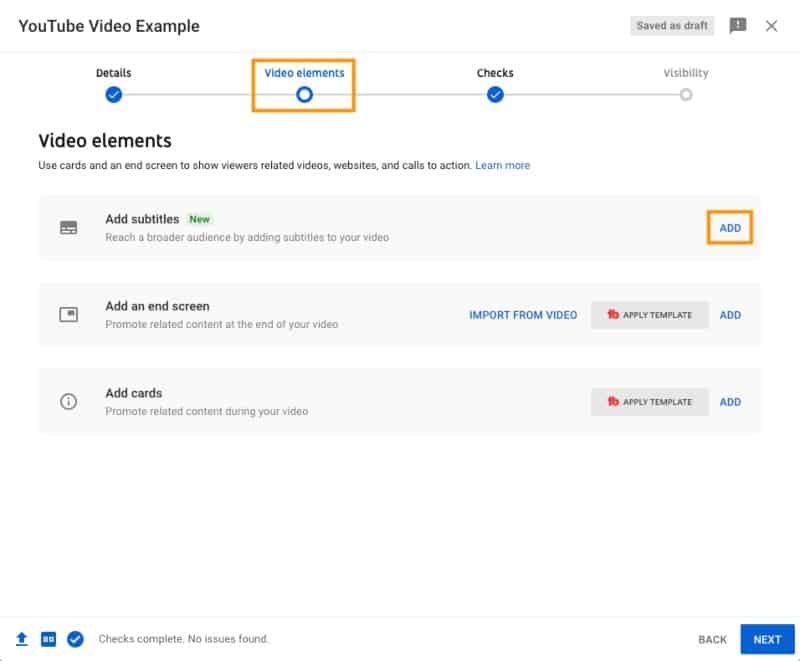
To add subtitles to a video during the uploading process, select the “Video elements” tab, and then click “Add” by the “Add subtitles” section.
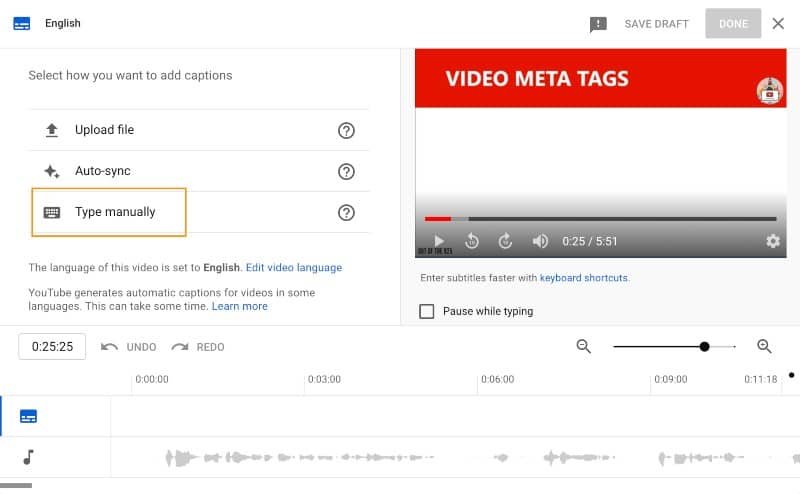
Now you can either upload a file with your subtitles or type them in manually. To add your subtitles manually, select the “Type manually” option.
Now you can type in your subtitles/captions and then align them with the audio using the timeline bar at the bottom of the screen. Stick to shorter captions and break them up, so that they don’t take up too much of the screen.
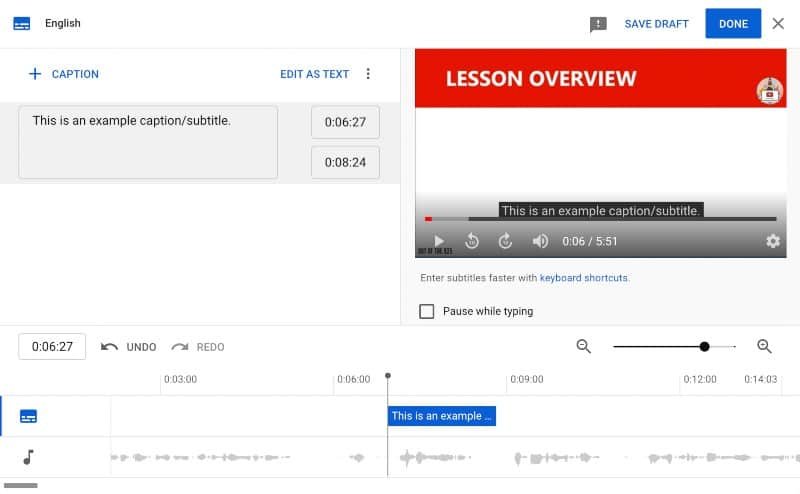
Once complete, select “Done” in the top right to save your captions.
Now if that seems like quite a lot of work, don’t worry. There is an easier way. You can add captions and subtitles to your videos automatically. Let’s look at how to do that.
How to add captions to your YouTube videos automatically
YouTube generates automatic captions for videos without you needing to do anything. This can take some time though, which is why you generally cannot edit the captions during the upload procedure.
To take advantage of auto-captions best, this is what you should do.
First, when uploading your video, either schedule it for a few hours (or a day) in advance or set it to unlisted. This will allow YouTube time to transcribe the video and then you can jump in and make any corrections or tweaks that may be needed.
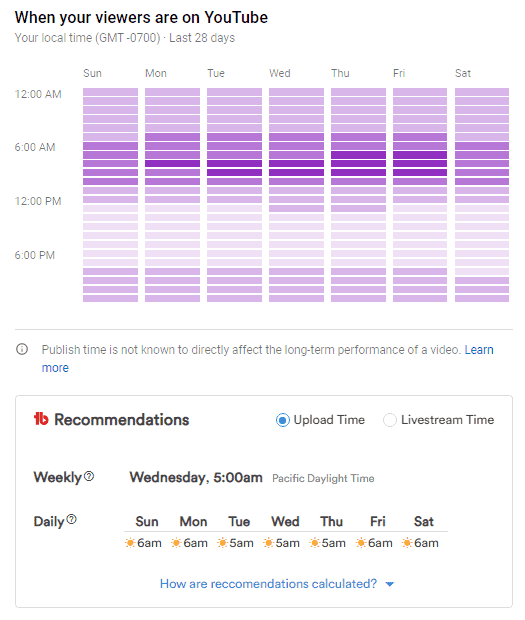
By scheduling your videos, you have the added optimization benefit of being able to set it to go live when your audience is most active.
You can see when your audience is most active with the free TubeBuddy extension.
Now that your video is uploaded and it’s had a few minutes/hours to process a transcription, we can go and edit the automatically generated captions.
Open the YouTube Studio, and select the video you want to edit the captions for.
In the menu on the left, select “Subtitles”.
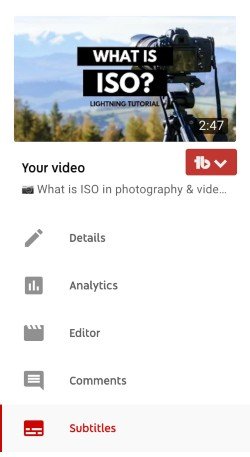
If the automatic subtitles have already been generated, you should see under the Subtitles section “Published: Automatic” as shown below.

To edit and correct the automatic subtitles/captions, select “Duplicate and edit”.
Next select edit timings for an easier workflow.
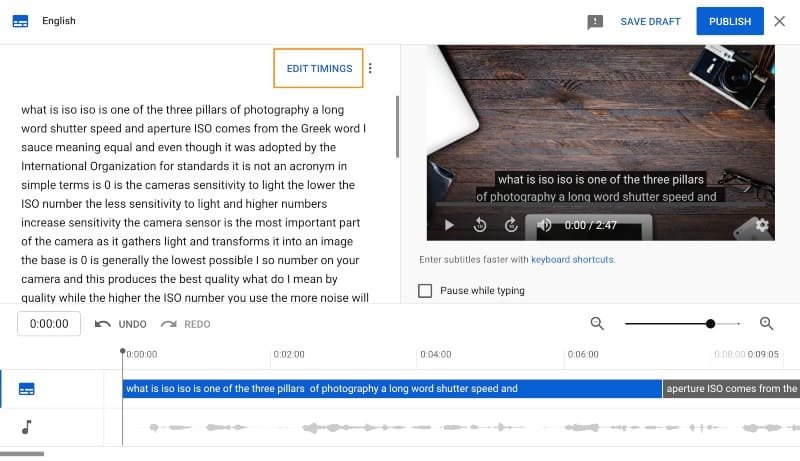
Now you can make corrections, and split caption sections to improve readability, and remove any unnecessary additions.
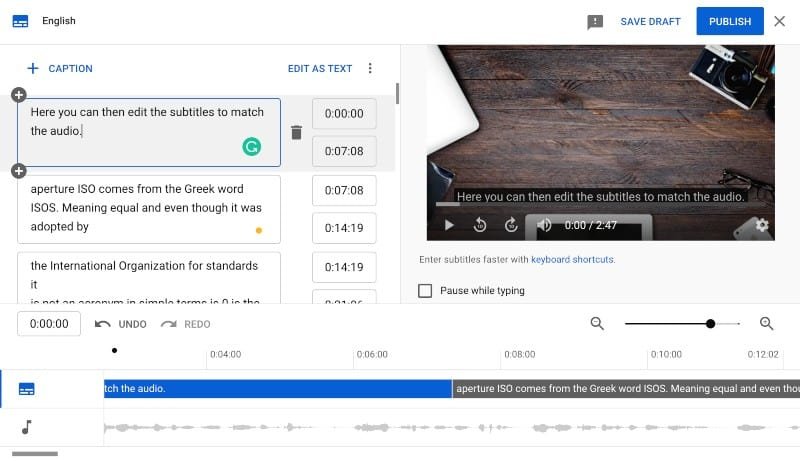
Once complete, select done and that’s it.
Note: Automatic captions are only available for videos in the following languages as of writing: English, Dutch, French, German, Indonesian, Italian, Japanese, Korean, Portuguese, Russian, Spanish, Turkish, and Vietnamese.
How to turn youtube subtitles on and off (closed captions on videos)
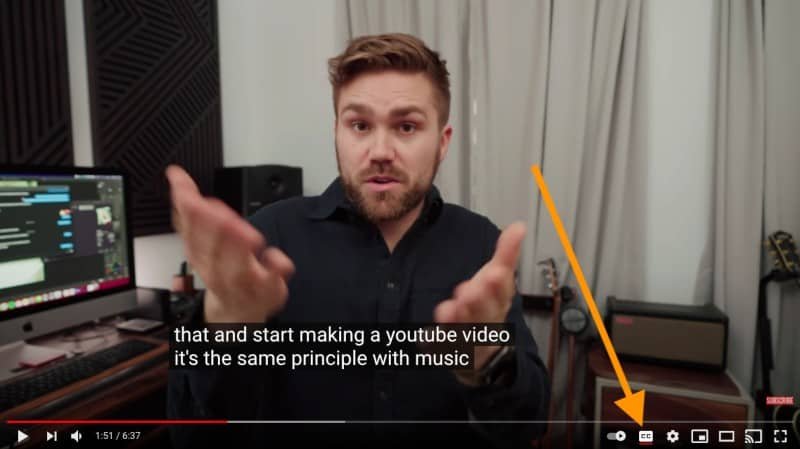
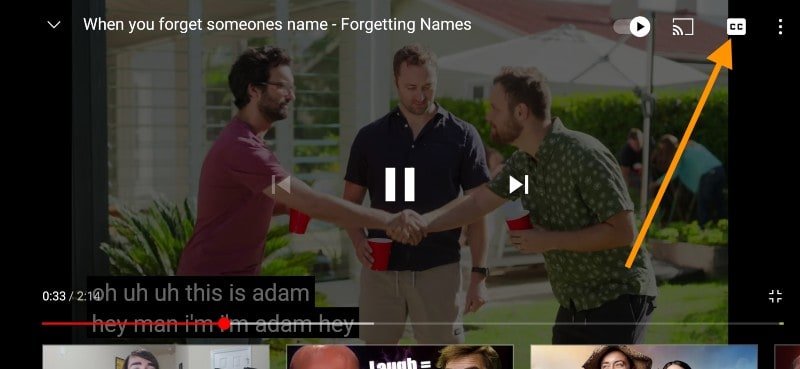
When watching a video, to turn subtitles or captions on (or off), all you need to do is click on the CC icon in the YouTube player. If you’ve turned it on, then tap it again to turn it off.
Now that you know how to add subtitles and captions to YouTube videos, you can reach a wider audience to grow your YouTube channel and extend your brand.
If you want to take your YouTube channel growth and reach further, I use and recommend TubeBuddy.

