In this article, we’re going to look at everything you need to know about YouTube Channel URLs.
From what the requirements are for a custom YouTube channel URL, what you need to do to claim yours if you qualify, and how to change your custom YouTube channel URL if you already have one.
That is right, previously it wasn’t possible to make a custom YouTube Channel URL change, but YouTube has opened this up and it’s great!
This means that if you started a YouTube channel when you were a teenager and picked a rather embarrassing custom URL, now you can change it. The same goes for those of us that just weren’t able to decide on a niche immediately. Regardless of what caused you to claim a URL that you no longer like, it’s now possible to change it to something far more appropriate.
If you already have a custom URL and want to know how to change it, scroll down below. For the rest, let’s start with defining the Custom URL requirements to see if you’re eligible.
Custom YouTube Channel URL Requirements
The requirements to claim your URL aren’t quite as strict as many of YouTube’s other requirements. To create a custom URL for your channel, your account needs to:
- Have 100 or more subscribers.
- Be at least 30 days old.
- Have an uploaded profile picture.
- Have an uploaded banner image.
As you can see, the last two you can finish up in a couple of minutes, while the 30 days and 100 subscribers are mainly to combat spam.
If you haven’t reached 100 subscribers yet, then this article can help you get there, but I’m afraid you will have to wait until your channel is at least 30 days old if it isn’t already.
If your channel is now eligible for a custom URL, then we can move on to actually claiming yours.
How to Claim Your Custom YouTube Channel URL
Before claiming your custom URL, it needs to be said that you cannot just choose any URL anymore, you are limited to names revolving around the following:
- Display name
- YouTube username
- Current vanity URLs
- Linked website name
This helps to make sure your channel URL is actually related to your YouTube Channel and isn’t completely off topic.
This is how to claim your custom YouTube URL:
Step 1: Log into your YouTube account.
Step 2: Open the YouTube Studio in the top right corner.
Step 3: In the left menu on the left, select “Customization” and then “Basic info”.
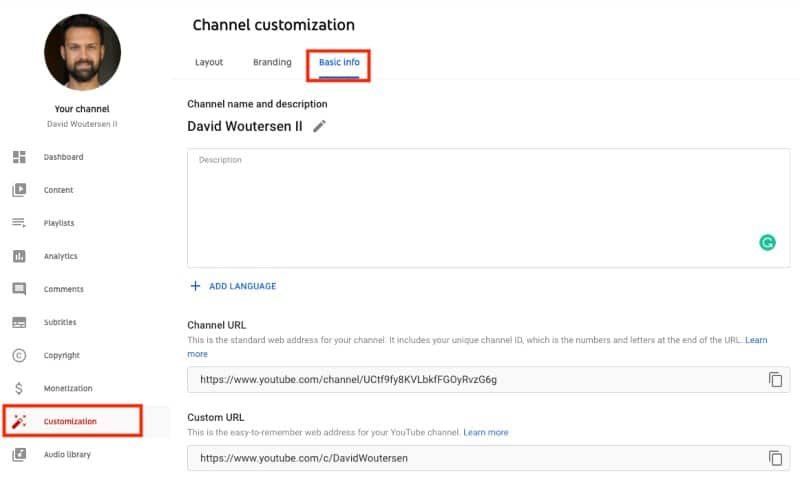
Step 4: Scroll down to “Channel URL” and click “Set a custom URL for your channel”.

Step 5: In the box that appears you’ll see the custom URL YouTube suggests for you based on your channel. You can then add additional numbers or letters to make it more unique.
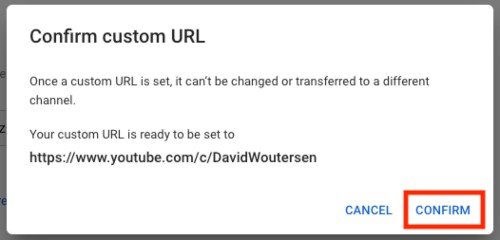
Step 6: Click confirm.
Step 7: Click confirm once again.
There you go, now you have a custom YouTube Channel URL.
How to Change Your Custom YouTube URL
Before you change your custom URL, it’s important to know a few things:
- You can only change your custom YouTube URL 3 times per year.
- Old custom URLs do not redirect to your new one. The channel URL does though, this is the URL every channel receives with your unique channel ID inside of it.
- You may not be able to immediately set a new custom URL as YouTube first needs to deactivate the old one which can take a couple of days.
Those are a few small caveats, but nothing major. So let’s get to it.
The first thing you need to do is remove your old custom URL.
Step 1: Log into your YouTube account.
Step 2: Open the YouTube Studio in the top right corner.
Step 3: In the menu on the left, select “Customization” and then “Basic info”.
Step 4: Scroll down to the “Custom URL” section and beneath that click “Delete”.

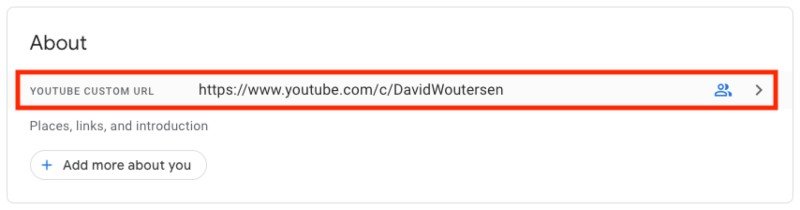
Step 5: You’ll be taken to your Google Account Profile, scroll down to the “About” section and select your custom YouTube URL.
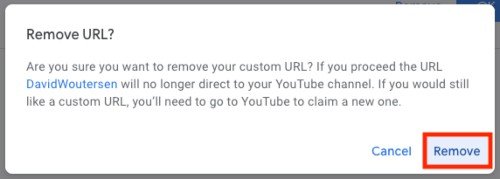
Step 6: In the box that then appears, click “Remove”.
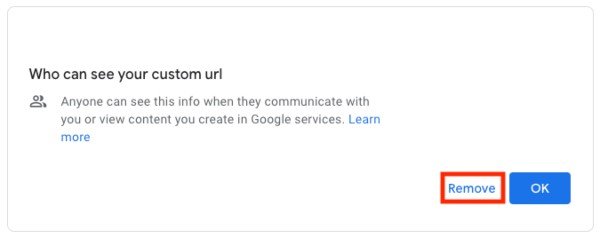
Step 7: Another box will appear, click “Remove” again to confirm.
You have now removed your old YouTube URL.
To claim a new custom URL, all you have to do is follow the steps to claim a custom URL that we outlined before above.
If you cannot claim your URL immediately, wait a couple of days for the URL to be deactivated by YouTube across the platform and then try again.
How To Find Your YouTube Channel URL
Once you’ve set your custom URL, if you ever find yourself wondering “What’s my Youtube Channel URL” and need to find it again, all you need to do is head to the customization section again.
- Open up the YouTube Studio.
- Select “Customization” in the menu on the left.
- Select “Basic Info”.
- Scroll down to “Custom URL” and there is the custom URL for your channel.
You can then copy and share it as you please.
Final thoughts on YouTube channel URLs
Once you’ve reached 100 subscribers, it’s quite easy to claim your custom channel URL. If you’re not happy with it, you can always change it, remember that you can only do this 3 times per year.
So don’t go overdoing it.
It’s also important to remember where you linked to your old URL and to make sure to change it. To be on the safe side, use the channel URL (the random letters and numbers) as this always redirects to your current custom URL and therefore, to your channel.
P.s. If you want to grow your channel, then I recommend installing TubeBuddy for free.