
You have created your YouTube channel, and it’s time to upload your first video. In this step-by-step guide, that’s what we’re doing as we cover exactly how to upload a video to YouTube.
Uploading videos to YouTube is one of the first steps you can take to grow a YouTube channel and can be the start of something great. It doesn’t have to be a complicated procedure, even though there may be some options and buttons you don’t understand. I’ve put together this beginner-friendly guide so that you can get your videos uploaded without requiring an engineering degree.
And in case you have some questions about video uploads, I’ve done my best to tackle the most common ones towards the end. Now, let’s get that video of yours uploaded.
- How To Upload a YouTube Video
- Step 1: Upload Your Video File
- Step 2: Add a Title And Description.
- Step 3: Upload a Custom Thumbnail
- Step 4: Add Your YouTube Video To a Playlist
- Step 5: Add Meta Tags To Your YouTube Video
- Step 6: Configure Advanced Settings (Easily)
- Step 7: Add a Video End Screen
- Step 8: Publish Or Schedule Your Video To YouTube.
- FAQs
How To Upload a YouTube Video
If you have not yet created your YouTube channel, this is the time for you to do it.
If you already have your channel up and running, nice job; make sure you are signed in to your YouTube account, and then we can begin.
Step 1: Upload Your Video File
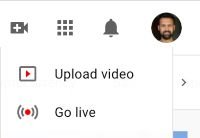
Click on the camera button in the top right of your screen, then select “Upload Video.”
Next, you will drop the video file into the designated area, click in the middle area, and select your file.
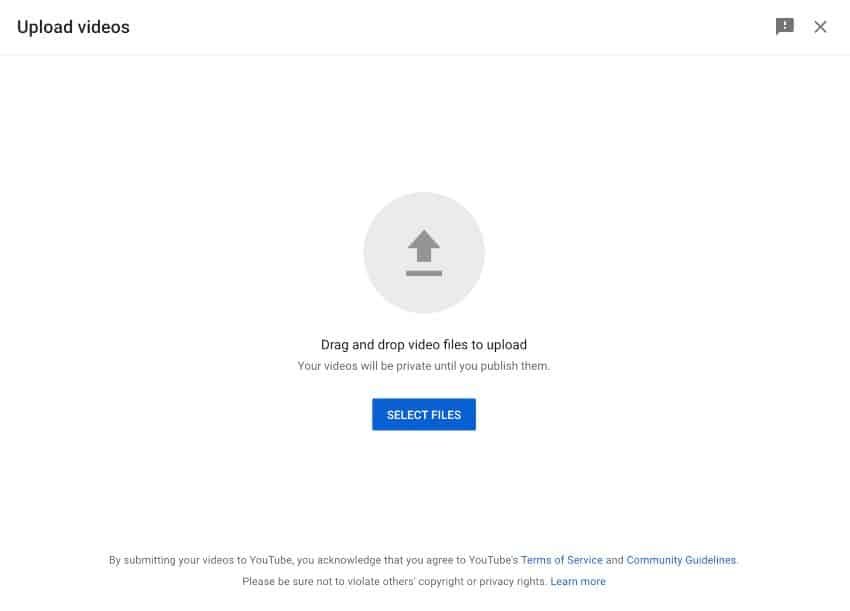
Once you’ve dropped your file or selected it, the uploading will commence, and you’ll be taken to the next screen.
Step 2: Add a Title And Description.
While waiting for your video to upload, you can fill out information regarding the video.
Two very important pieces of information are your YouTube video title and description (#1 and #2 below).
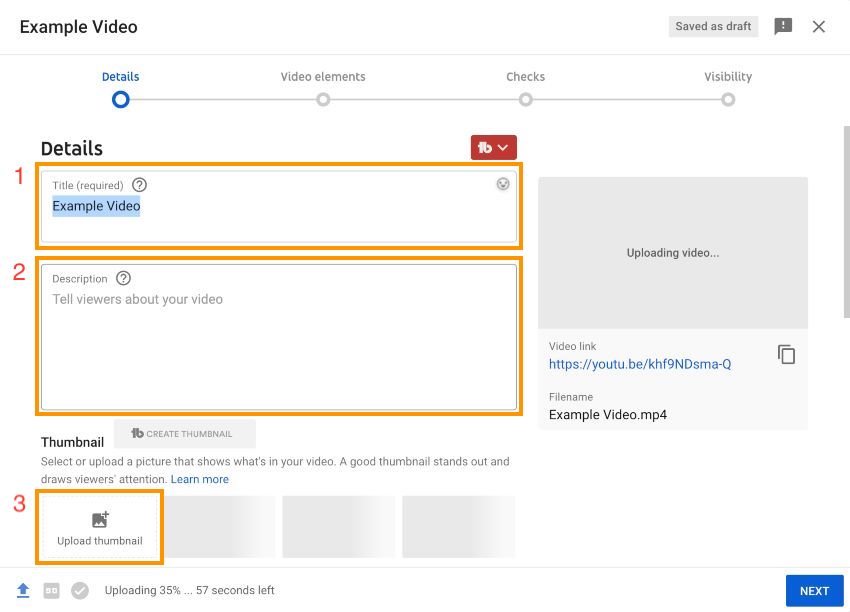
Under the “Details” section, the first field will be already filled out with the name of the clip you’ve uploaded. Change this to the title that you would like for your video. You have up to 100 characters to make a clickable and accurate title.
Always use relevant keywords to help your video get found in search results. Here the TubeBuddy browser extension is a great help; you can install TubeBuddy for free.
The next field, “Description,” is where you will insert your video description. The description should best describe your video and include keywords and phrases to help it appear in search results. You can include up to 5000 characters here.
In your YouTube video description, you can add links to your website, affiliate links (with disclosures), social links, links to other videos, etc.
This is also where you can start a conversation with your audience by asking questions or posting statements to provoke a discussion in the comments.
Step 3: Upload a Custom Thumbnail
Your thumbnail is the cover image first seen when scrolling through YouTube.
This means it can be your first point of contact with a potential viewer and is a very important factor in determining whether your video will be clicked on or someone else’s.
To upload a custom thumbnail, click on the “Upload thumbnail” button (marked as #3 in the image above) and then select the image you want to use as your thumbnail.
YouTube thumbnails should have the dimensions 1280 x 720 and be less than 2mbs in size, and you can easily create great thumbnails using Canva for free.
Step 4: Add Your YouTube Video To a Playlist
To add more context to your video and similar group videos on your channel, add your YouTube video to an appropriate playlist.
Click on “Select” in the Playlists section. Then select an appropriate playlist.
If there are no appropriate playlists, create a new one by selecting “New Playlist” at the bottom of the dropdown menu.
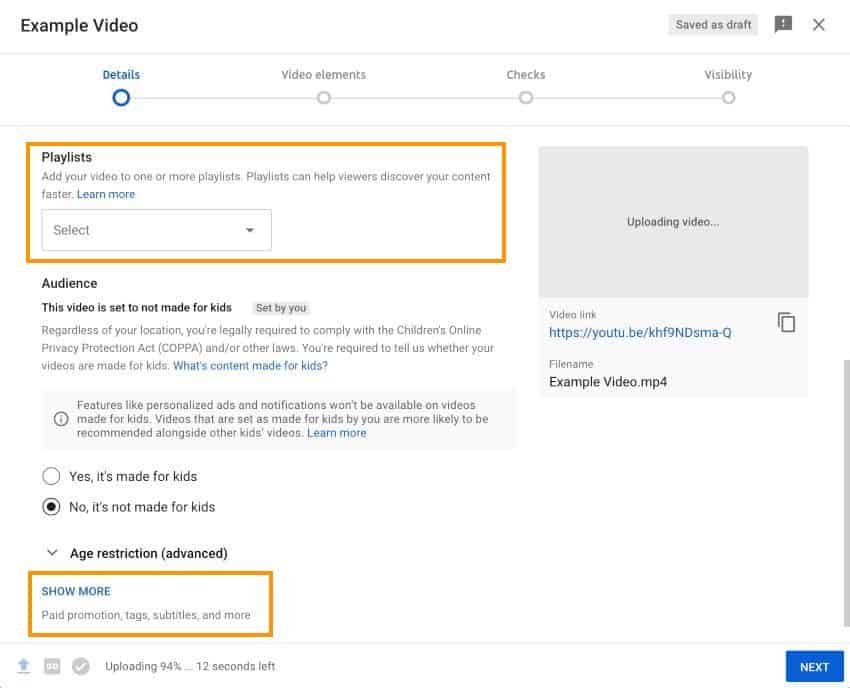
Now it’s time to add some advanced settings, so go ahead and select “Show More,” as highlighted in the image above.
Step 5: Add Meta Tags To Your YouTube Video
Tagging your video is one of the best ways to improve your video’s SEO (Search Engine Optimisation), which results in being found easier in search and through discovery.
Once you’ve clicked to show more, the Tags field will appear (as well as some more options). The “Tags” field is where you can enter your video tags (also known as “meta tags”).
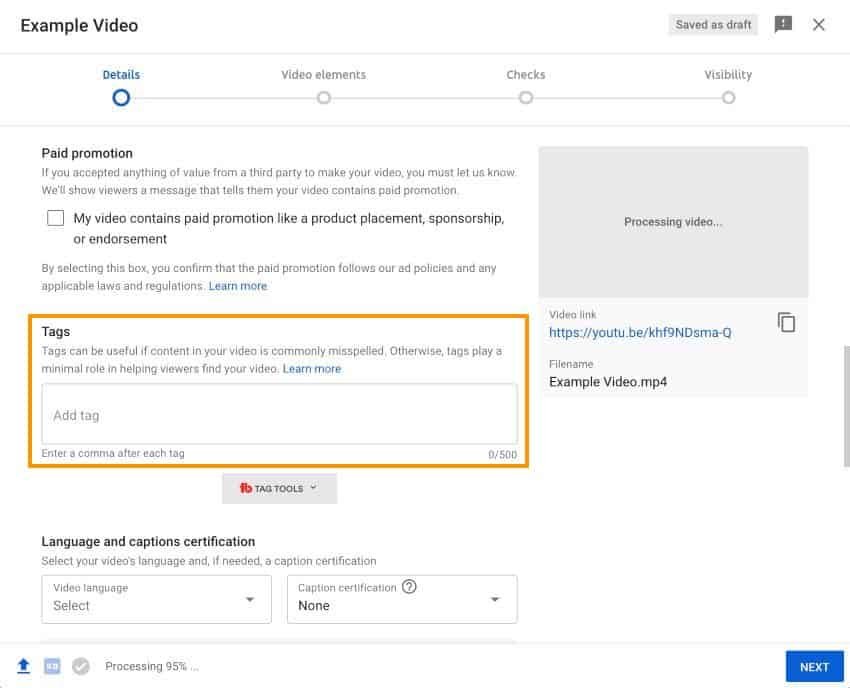
These can be up to 500 characters, and you should use as many of these characters as you can. The best tags are keywords and search terms that relate to your video. These can be individual words, phrases, or even complete sentences.
Separate your keywords by using the comma (,) symbol.
Again, this is another job that TubeBuddy can help with. It’s a great tool for finding relevant keywords.
Step 6: Configure Advanced Settings (Easily)
Now that you’ve added tags, you can add advanced settings by scrolling down.
You generally don’t have to worry about most of these, so here are the most important ones, followed by an explanation:

Video language: Select whichever language your video is in. This will be the default language of the video; you can add additional translations later if you want to and if they would be helpful for potential viewers (now and then, change your YouTube language to make sure everything looks correct in the other language).
Video location: Videos can be searched by location, so add a relevant location. This is most useful when making videos with a location element, like a travel video or a video for your business with a physical address.
Allow embedding: This option is automatically checked; you should leave it checked. This allows people to embed your video on their websites and gain more views that way (you can also embed it on your website if you have one).
Publish to subscriptions feed and notify subscribers: This option is also automatically checked, and you should also leave it checked. This means your videos will be pushed to the “subscriptions feed” of people who have subscribed to your channel, and people who have clicked the bell notification will get a notification. Both help you get more initial views on your video.
Category: This is not that important, but it can help add context to some videos. This is especially useful for gaming videos, as you can select the same game and have a better chance of being found by people interested in that specific game.
In the advanced settings, you will find additional options, like turning off comments, editing the video’s license rights, age restrictions, and more; you can change these if you wish; otherwise, leave them as is and select next.
Step 7: Add a Video End Screen
Click “Add” next to the video end screen option.
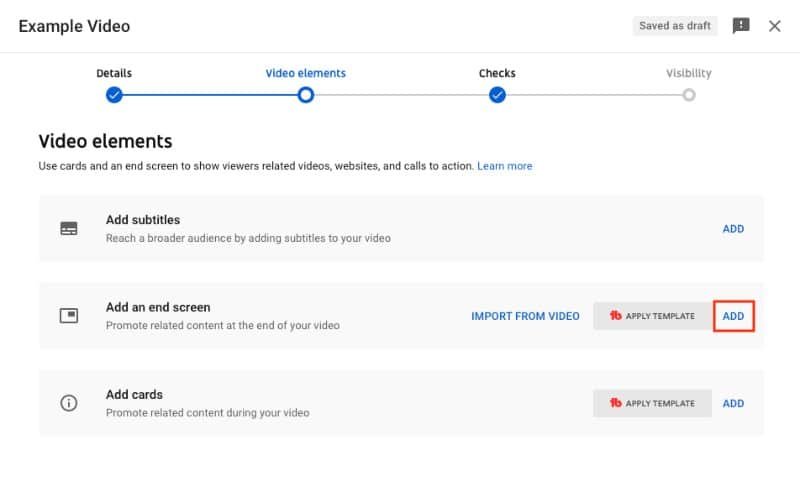
In the top left corner, select the “+ Element” option and add some elements to your End Screen.
You can add playlists, a subscribe button to your channel, and other videos. You can even link to external websites (when you’re accepted into the YouTube Partner Program, so not something you will have immediately available).
I recommend adding a link to subscribe to your channel, a link to your latest video, and a video link where YouTube selects your most appropriate video for the viewer automatically.
If you only have this one video currently, don’t worry; these will populate once you have more content on your channel.
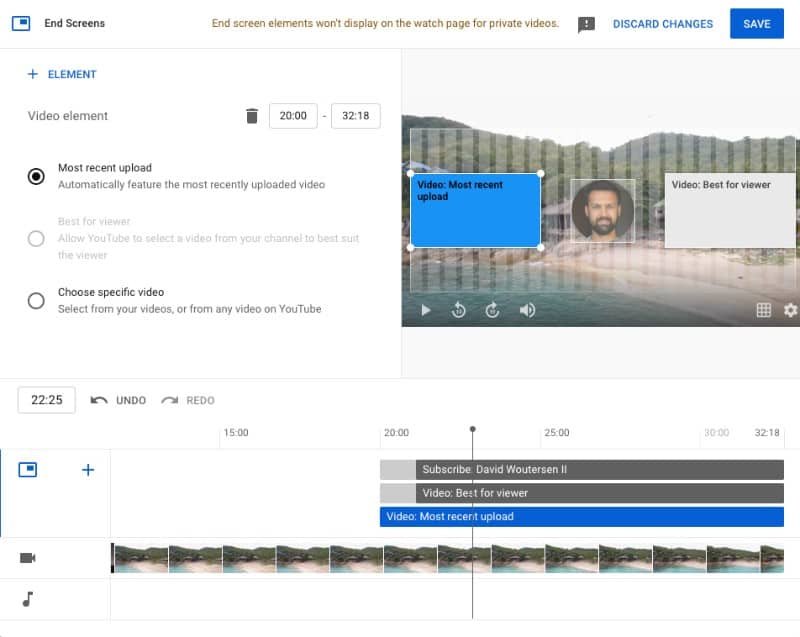
Next, click “Save” and then “Next.”
You’ll then see the YouTube checks section. If you have no copyrighted material in your video, this will show that no issues were found, and you can click “Next” again.
Step 8: Publish Or Schedule Your Video To YouTube.
The last step is to publish your video.
You can select the publish option if you want your video to appear at a specific time. If you want your video to be private or unlisted, then you select either of those options.
For this guide, we will select the “Public” option so that the video goes live as soon as we click the “Publish” button.
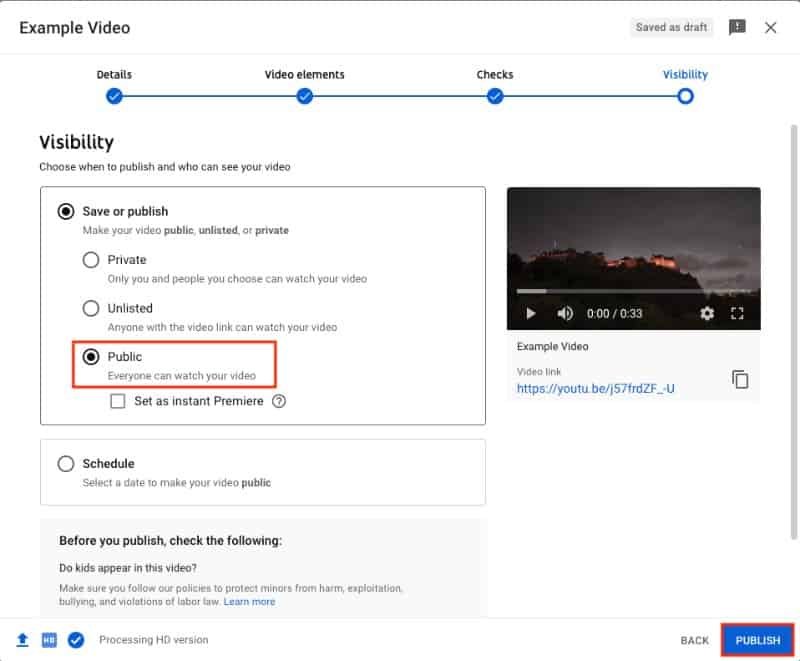
Select whichever option you prefer, then hit the publish button and watch your video go live (or the schedule button if you choose to schedule it).
Now congratulate yourself; you’ve just uploaded your video to YouTube.
P.s. You can also Premiere your YouTube video for immediately published and scheduled ones.
P.p.s. If you want to translate your title and description to another language, you can do that through the translation tab in your YouTube studio once the video is published.
FAQs
Can You Upload a Video To YouTube Without a Channel?
You cannot upload a video to YouTube without a YouTube channel. If you have not set up a channel, you will be prompted to create a YouTube channel when uploading your first video. This will act as the archive for your YouTube videos, and you can customize your channel to make it more personal.
If you do not want your videos to be seen by people on YouTube, you can set them to unlisted or private.
How Many Videos Can You Upload To YouTube For Free?
YouTube does not limit the number of videos you can upload. This means you can upload unlimited videos to YouTube for free.
How Long Can a YouTube Video Be?
A YouTube video can be a max of 15 minutes for unverified channels and up to 12 hours for verified channels. This used to be longer, which is why you can still find videos on YouTube that are much longer than this.
What Is The Maximum Size Video I Can Upload To YouTube?
The maximum size of a video you can upload to YouTube is 256GB. If your video file is larger than that, try compressing it in the H.264 codec. And if you’re having trouble uploading a file size larger than 20GB, ensure your browser has been updated.
Why Is My YouTube Video Blurry When I Upload It?
YouTube videos are often blurry immediately after uploading as YouTube displays a low-resolution version of your video while it processes the high-quality version in the background. This can take a couple of minutes, depending on the size and length of your video.