Setting up a YouTube channel can be the start of an exciting journey, and in this article, I’ll show you how to do it step-by-step.
YouTube can offer a wide variety of things to yourself or your business. These could be allowing you to express yourself more creatively, bringing in extra viewers to your business, or connecting with a community that shares your interest, and that’s just the start
With enough time and dedication, just about anyone can become a successful YouTuber.
If you already have a YouTube channel set up, you can skip to my guide on uploading your first YouTube video.
Skip ahead:
Popular YouTube Myths that are WRONG
Before we start, though, let’s look at three myths about setting up a successful YouTube channel in 2023.
Myth #1: You Need Expensive Equipment To Be Successful
This is often used as a myth and an excuse for not starting a YouTube channel. Many successful YouTubers do not use expensive gear and equipment, and many of the top YouTubers started using whatever they had available.
Some channels do not even use cameras at all.
It all comes down to the type of benefit, entertainment, information, education, etc. that you can offer your viewers.
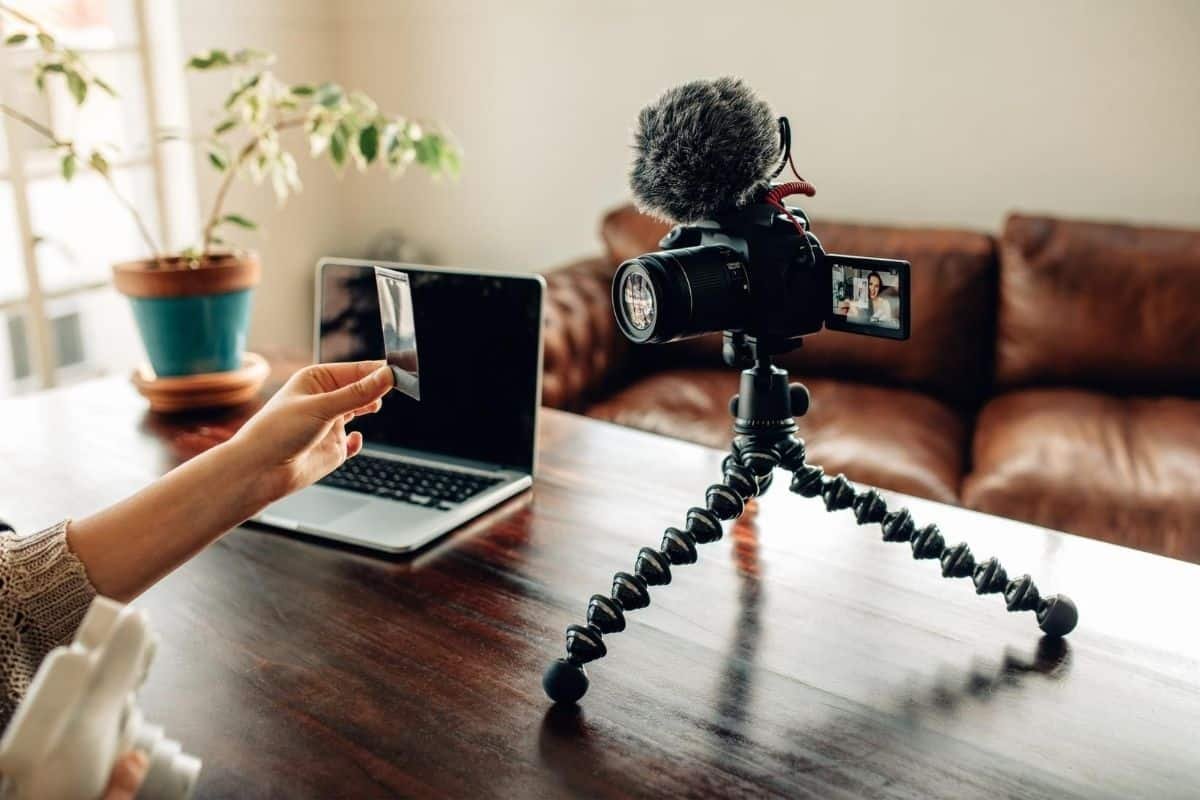
Modern smartphones provide excellent video quality without purchasing additional cameras or gear if you want to film with a camera. If you are to invest in one thing, I’d recommend a simple smartphone tripod like this one from Manfrotto or a Gorillapod that can be mounted to just about anything.
Myth #2: Only Certain Niches Can Be Successful
Picking a YouTube niche is very important to growing your Channel. This gives your channel some identity and direction. In turn, persuading viewers to subscribe for more awesomeness.
When picking your niche, don’t pay attention to which other niches are successful; look at what interests you, what you’re good at, and what you can provide your viewers through that niche.
If you can provide value to your viewers, you’ll gain subscribers, and your channel will grow.
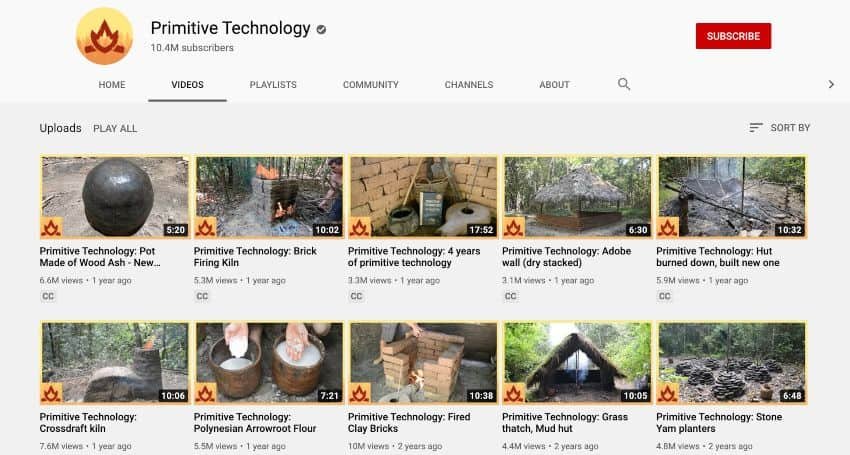
Being successful really only depends on what goals you’re setting out for your channel.
If your main goal is to bring people to your website or to grow a community around a specific topic, you’re going to find that it doesn’t matter which niche you’re in. Of course, you can optimize things by niching up or niching down to find the best balance for your channel.
Myth #3: You Need Millions of Subscribers to Make Money
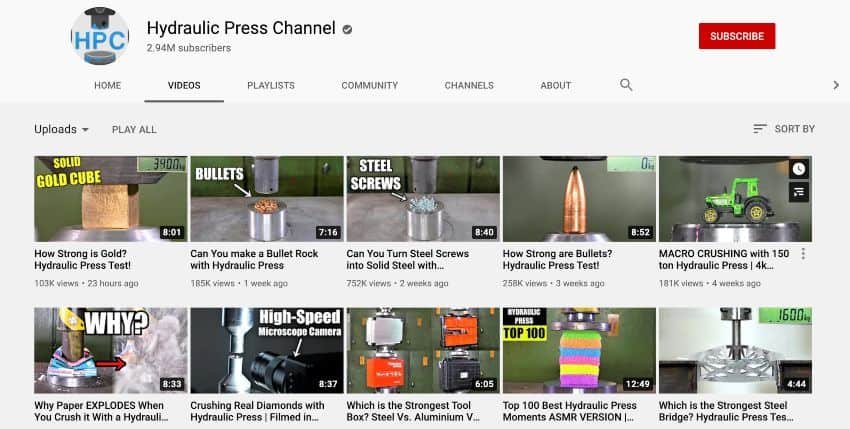
Like picking your niche, sub-count can be irrelevant to success. If your main goal is only to get a million subscribers, then that number does matter, but it’s not something that really should be objective.
It can be a great benefit, don’t get me wrong, but it shouldn’t be the main focus.
If your main objective, for instance, is to make money using your YouTube channel, the YouTube ad revenue you get once you’ve passed 1000 subscribers is really not the best way to monetize your channel.
Other ways to provide a far greater return with far fewer subs and views would be affiliate marketing, sponsorships, partnerships, products, etc. These can get you 10x the return you would on ads (which tends only to be between $2 and $13 per 1000 views).
How to Set up Your YouTube Channel
Once you’ve decided on your niche, Channel name, content ideas, etc., it is time to set up your YouTube Channel. This is quite a straightforward process and shouldn’t take too long.
Step 1: Create a Google & YouTube account.
As YouTube is owned by Google, you will need to create a google account to use as your YouTube account. You can set up a Google account here.
Now that your Google account is set up you can head over to YouTube. In the top right-hand corner of the screen, you’ll see your account thumbnail.

You’ll now be presented with a drop-down list. Select ‘My Channel’.

An option will then pop up with how you want to use YouTube, this will be your channel name. If your channel is just your name, go ahead and click on the ‘create channel’ button. If you want a custom name, click on the ‘Use a business or other name’ button.

In the next field, you can enter your channel name and then hit ‘create’.

Now pat yourself on the back, you officially have a YouTube channel!
Step 2: Adding YouTube Channel art.
Now that you’ve set up your YouTube account and have a channel, you’re going to want to add some imagery… meaning channel art / a YouTube banner.
This is going to be a quick step-by-step process of uploading channel art, for more info on the creation process, check out this article on how to create a YouTube banner.
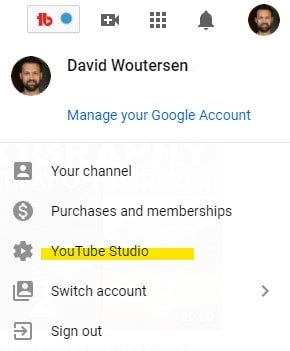
First, we need to open the “YouTube Studio” in the top right corner.
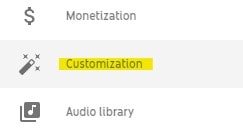
In the menu on the left, select “customization”.
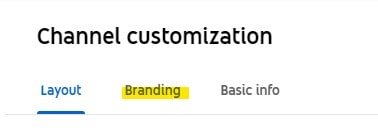
Select the “Branding” tab at the top.
Under the “Banner image” section, select upload.
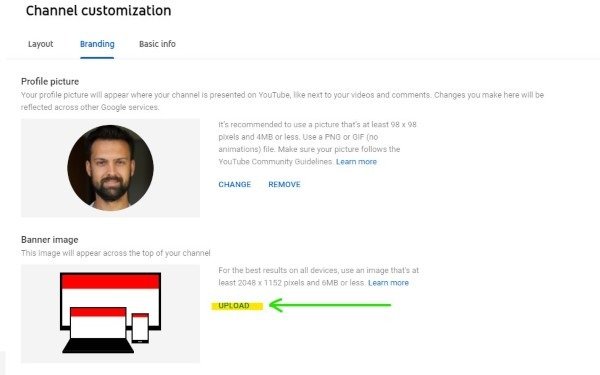
Select your banner, and then select done.
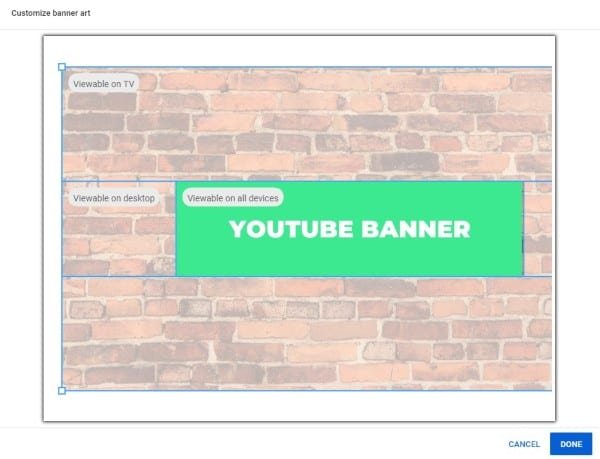
Lastly, hit the Publish button in the top right corner to save your changes.
NOTE: Immediately after uploading when you visit your channel, your banner may look slightly blurry. This is normal as it hasn’t been processed completely and should be fine in a few moments. To speed things up, do a hard refresh (Ctrl + F5 on Windows, CMD + R on Mac) and your banner should look fresh and crisp.
Step 3: How to upload a Profile Picture to your YouTube Channel
Now that your channel art is live, we can look at how to upload a profile picture to your YouTube channel.
In the same channel customization and branding tab that you found the channel banner option, you will also see a profile picture section.
All you have to do is click on the Upload button and select your profile picture.
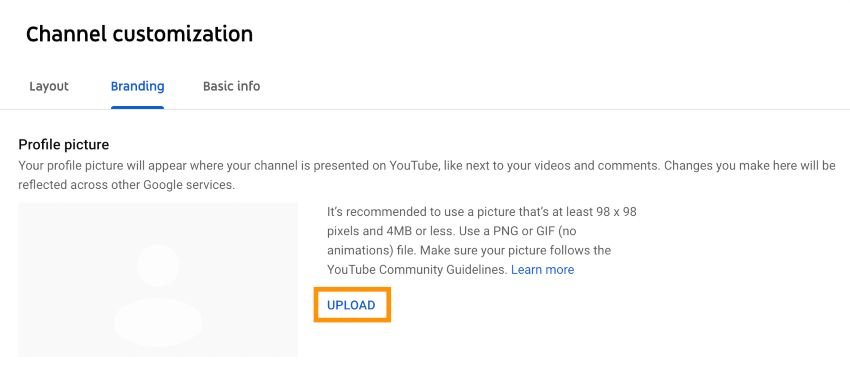
Your YouTube profile picture should:
- Be in JPEG or PNG format (or GIF, but animations do not show, I recommend PNG).
- Have dimensions of at least 250 x 250 pixels.
- Clearly showcase you, your logo, or what your channel is about.
NOTE: It can take a few hours for your profile picture changes to become visible on your YouTube channel, so no need to redo it if it doesn’t change immediately.
Now that all of that is complete, your channel is really starting to take shape!
Step 4: Filling out your YouTube Channel Description.
As things are really starting to come to life, it is time to fill out your YouTube About section, a.k.a. your YouTube Channel Description. Here’s how:
First, open the Channel customization found in the menu on the left in the YouTube Studio.
Select “Basic info”.
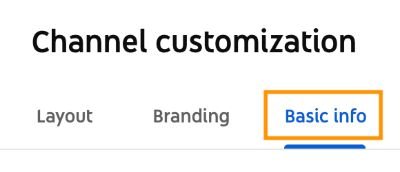
Here you have the option of changing your channel name easily if that is ever required.
More importantly though, beneath that, you will find the channel description box.
Here you will have 1000 characters to tell your viewers who you are, what you and your channel are about, and why they should subscribe.
You should also include keywords here related to the videos you are going to be making.
The first sentence is the most important, so get straight to the point here. This is because the first approx. 150 characters are read by YouTube’s bots and are considered the most important. These first 150 characters are also shown in search results, as you can see below.

Below your channel description, you can add your social media and website links.
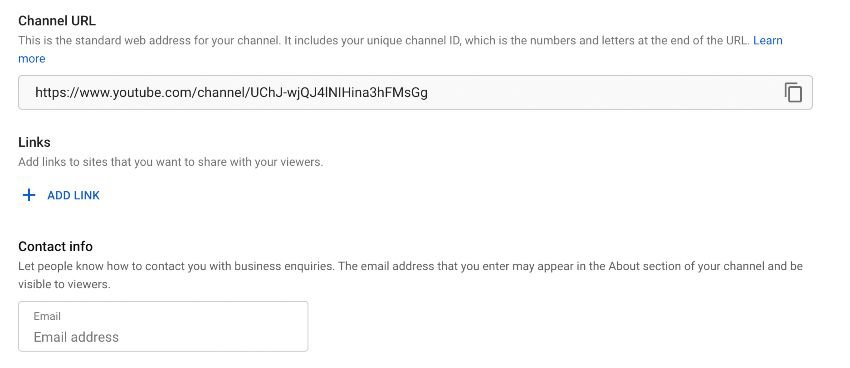
You can add just about any link here.
These links will be visible on the about page and also visible on the right side of your channel art/banner.

Further down you can also add an email address for business inquiries for people and businesses to reach you more easily.
Step 5: How to customize your YouTube Channel Layout.
In order to make your channel stand out further, you can adjust the layout.
This is another option that you can do from the customization section in your YouTube Studio. You can find it under the “Layout” tab.
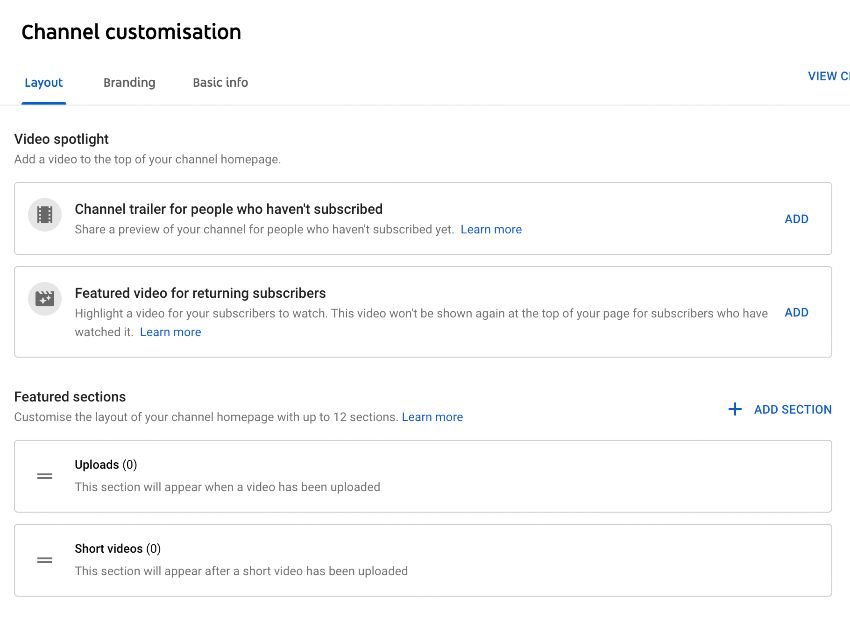
Under the video spotlight section, you can select the videos that should be shown more prominently at the top of your channel.
The section “Channel trailer for people who haven’t subscribed” will be shown to non-subscribers when they visit your channel.
Here it’s best to select a video that best represents what your channel is about, or create a highlight reel.
Select “Add” and then select the most appropriate video.
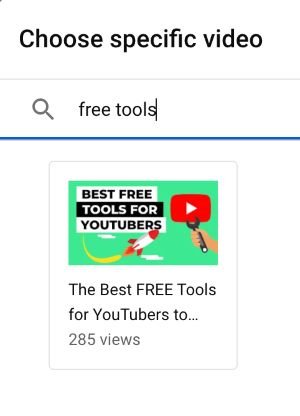
If you have a lot of videos on your channel, you can use the search bar to find the video more easily.
The section “Featured video for returning subscribers” will be shown in the place of this video for people that are already subscribed to your channel.
Here you can select one of your own videos, or any other video on YouTube.
Most of the time, it’s better to select your own video here, either something you’re looking to promote more or select your latest video.
The featured section beneath that is where you can personalize your channel further.
These sections can be filled with your recent uploads, popular videos, playlists, etc.
To add one of these sections, click on the ‘Add section’ button and select what type of section you want to add.
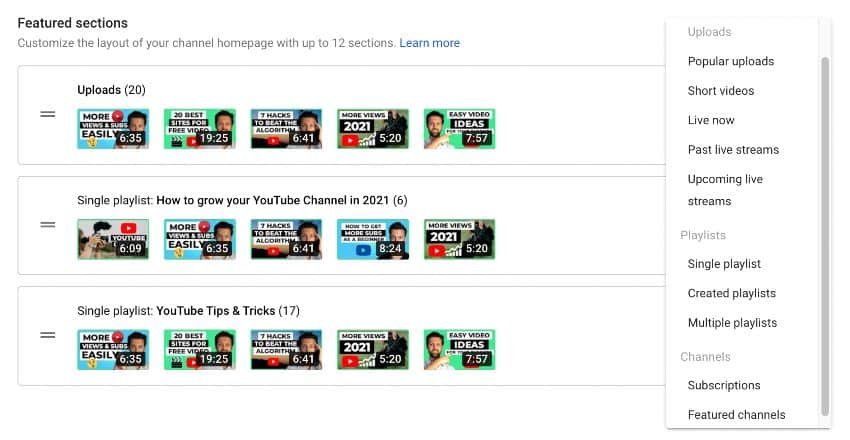
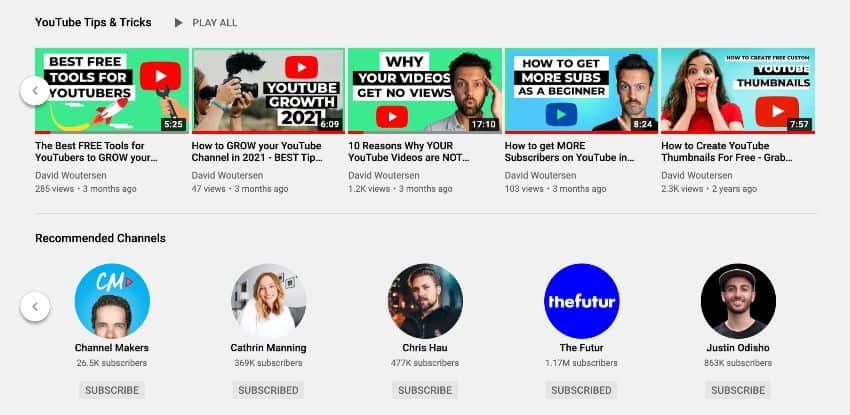
An interesting option at the bottom of the list is the ability to add “Featured channels”. This could be used to highlight any additional channels you have, channels you like, or channels you are collaborating with.
These will then appear with a subscribe button on your YouTube channel home page.
To add a section like this, click on “Add section” and select the “Featured channels” option from the dropdown menu.
Next, give the section a name, i.e. Featured Channels, My other channels, Friends of the channel, etc.
You can then search for the channels you want to add.
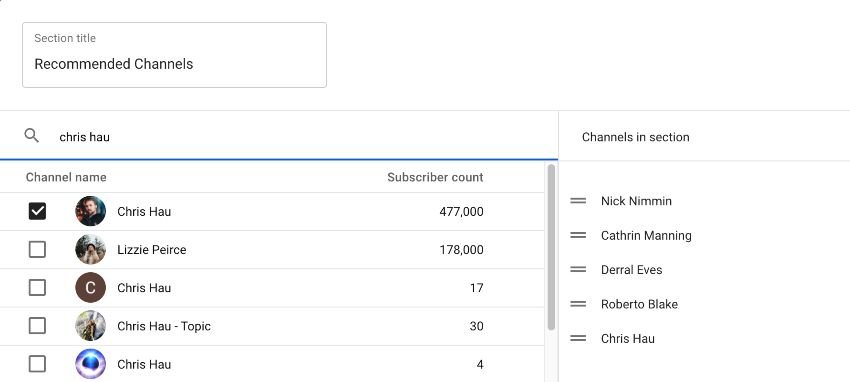
Marking the box next to the name will add them to the list and you can rearrange the list by drag-and-drop.
Save your changes by clicking “Done” when you’re finished.
Customizing your channel will be a little bit easier once you’ve got a few videos on your channel, but you can get ahead by creating a few sections to fill up your home screen a little bit so new viewers can see what your channel is about.
P.s. You can also make a playlist with other users’ videos that will show on your channel, this can be useful if you have multiple channels, or do not quite have enough videos on your channel yet.
Step 6: How to add YouTube Channel Keywords
First, what are YouTube channel keywords?
These are the main phrases and topics that your channel is related to. Adding channel keywords helps provide YouTube with context on what your channel is about and helps it get shown to people that will be interested in your content.
This is why it’s important to use keywords that accurately describe what your channel is about and the videos you make.
How do you add keywords to your YouTube Channel? Here’s how.
From the YouTube Studio, click on “Settings” in the bottom left corner.
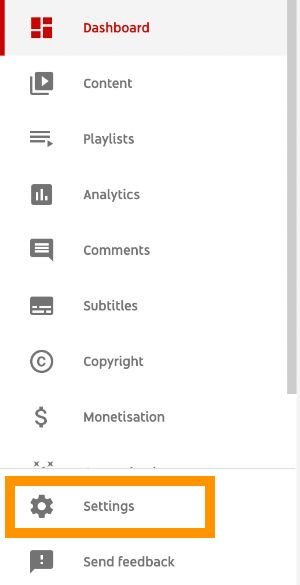
Next, select “Channel” from the menu on the left.
Under the tab “Basic info” you’ll see a box marked as “Keywords”.
This is where you can now enter your YouTube channel keywords.
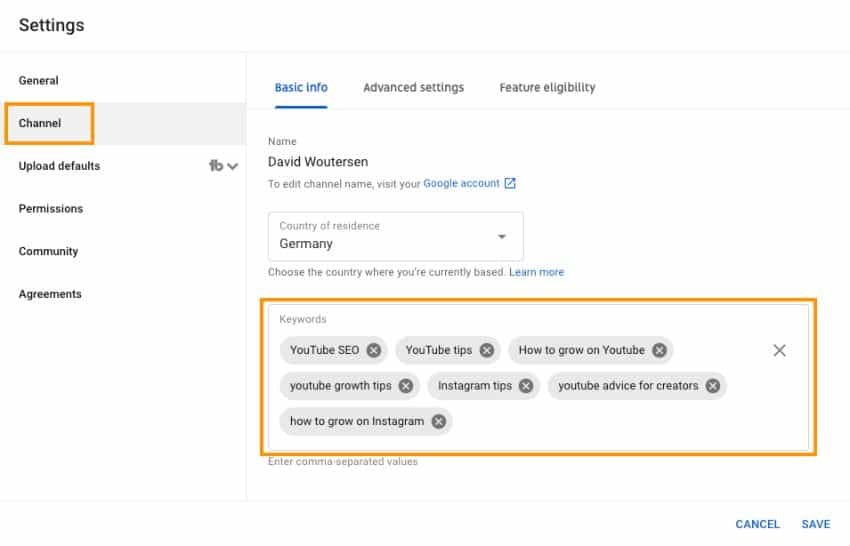
You should include between 7-10 relevant channel keywords.
These can be individual words, or short phrases/sentences, but try to keep them between 2-4 words in length.
The main goal of these keywords should be to describe what your channel is about.
So, if you make videos on landscape photography, then “Landscape Photography” would be a very relevant keyword that accurately describes what your channel is about.
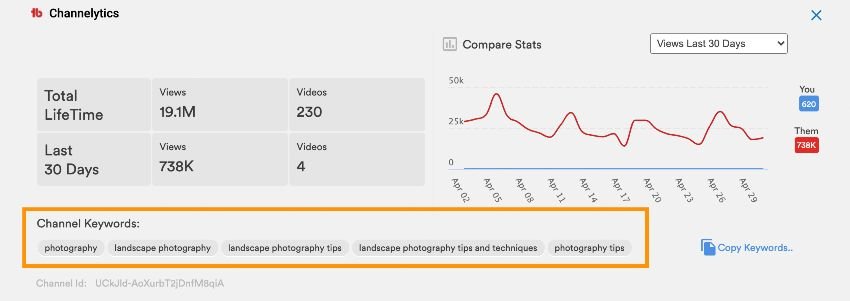
If you’re not sure what sort of keywords you should use for your channel, or you’re just looking for some inspiration, then you can also take a peek at what similar channels have as their channel keywords.
All you need for this is to install the free TubeBuddy browser extension here.
Once installed, when you visit a YouTube channel, you can see the exact keywords they have included on their channel like this:
Once you’ve added relevant keywords, make sure to hit the save button.
YouTube now knows a little bit more about who would be interested in watching your videos, making it more likely to be recommended and suggested to people that are interested in those topics.
Step 7: Verifying your YouTube Channel.
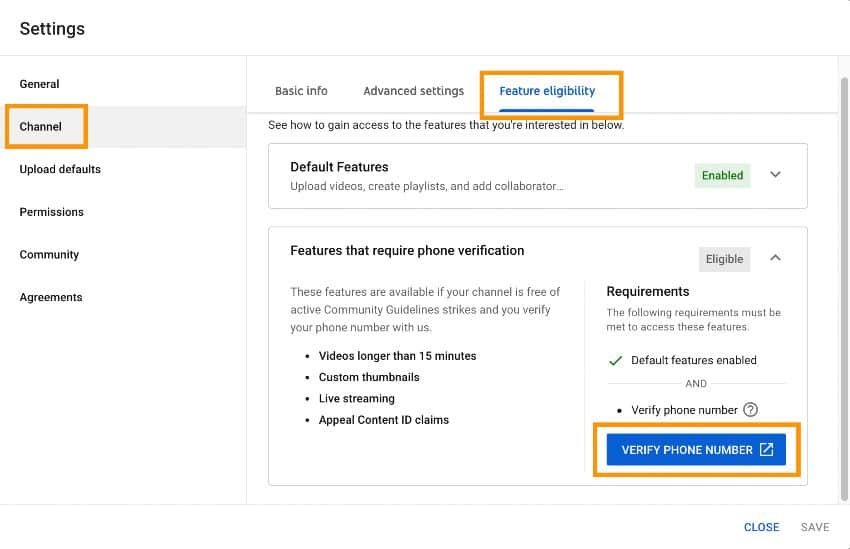
Verifying your account allows you to upload longer videos, and use custom thumbnails, live streams, and more useful features. So, how do you verify your YouTube Channel?
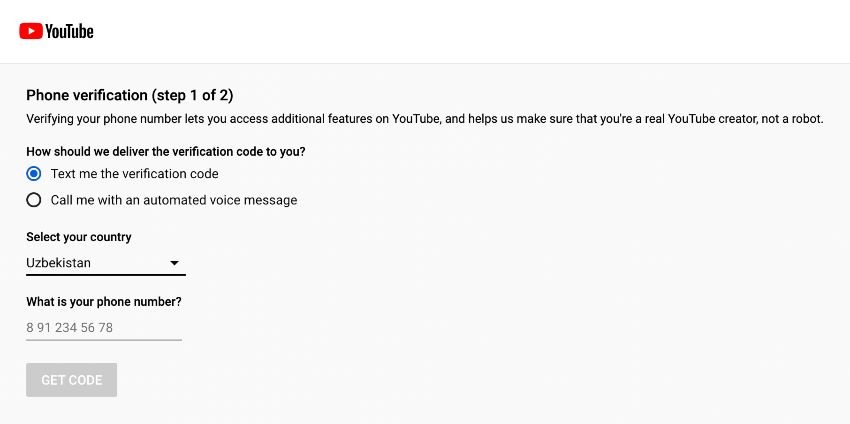
It’s quite a quick process, but you will need a mobile phone to accept a message or automated phone call.
This is what you need to do.
First, you’ll need to open the YouTube studio and head to the “Settings” in the bottom left corner.

In the settings, Select “Channel” from the menu on the left, then the “Feature eligibility” tab at the top.
Now click on the “Verify phone number” button.
Then you’ll be taken to the following screen where you can enter your mobile number and either receive a text message or an automated voice message with a code to verify your identity.
The process is rather simple and quick.
Follow the on-screen instructions and you should receive a verification code to enter.
Confirm it and voilà.
You’re now verified and you have a pretty great-looking channel.
The next step is uploading your first YouTube video.
A great tool to help you along your YouTuber journey is TubeBuddy, a free browser extension that is one of the best YouTube keyword tools (amongst other things).
